Custom Paper Box Packaging: The Sample Approval Checklist That Prevents Expensive Reorders
Turn the guidance into a production brief
Send your product size, quantity, destination and target date for a structured packaging recommendation and quote.
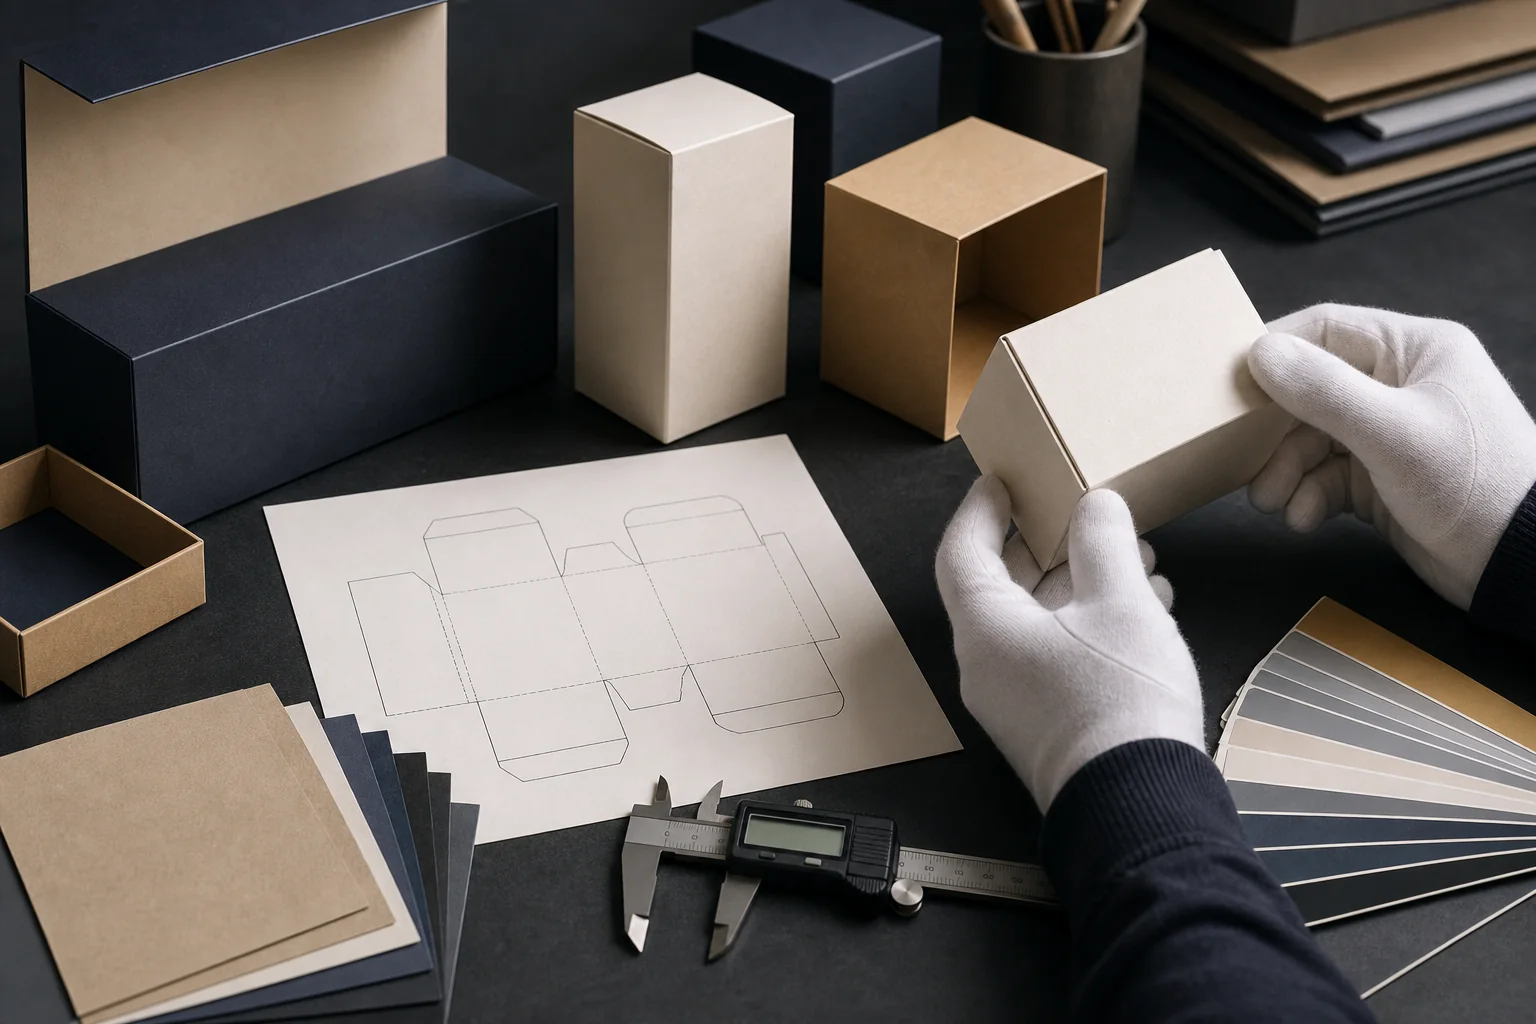
Custom Paper Box Packaging: The Sample Approval Checklist That Prevents Expensive Reorders
A beautiful sample can still become a disappointing production run. The cause is rarely one dramatic mistake. More often, several small assumptions survive approval: nobody defines which edge aligns with the artwork, the paper board changes after quotation, a digital proof is treated as a color standard, the insert is tested without the real product, or the approved sample is never identified as the production control sample. This guide turns those assumptions into checkpoints for brand owners, product developers, purchasing teams, and operations managers ordering custom paper box packaging.
The short answer is simple: do not approve a box from appearance alone. Approve the specification, dieline, structure, materials, print target, finishing limits, assembled performance, packing method, and signed control sample as separate items. A supplier can then reproduce a defined result instead of interpreting a mood board. The process may add days before production, but it prevents rework, delayed launches, repacking, freight claims, and unusable inventory.
Why Good Packaging Conversations Still Produce Bad Orders
Packaging discussions often begin with dimensions, quantity, logo, and a reference photograph. Those details support an estimate, but not manufacturing. A picture may show a rigid setup box while the quotation assumes a folding carton. “Matte black” can describe dyed paper, printed ink, film lamination, or coating. “Gold logo” can mean metallic ink, hot foil, cold foil, or a printed simulation. Each behaves differently under light, abrasion, folding, and transport.
Packaging communities repeatedly describe colors that differ from screens, misfolded flaps, missing scores, dirty surfaces, loose inserts, and difficult communication after payment. Converters describe the opposite side: small quantities carry fixed setup costs, each artwork version may require another run, complex geometry needs testing, and screen colors are not measurable press targets. Both sides are describing a missing approval system.
A useful system separates facts from preferences. Facts include finished dimensions, board grade, paper weight, flute, print process, ink reference, coating, foil code, insert tolerance, packing quantity, and acceptance limits. Preferences include premium, elegant, warm, subtle, or minimal. Creative direction matters, but every preference must become a material, measurement, reference sample, or agreed visual range before production.
Build a Complete Quotation Brief
Give every candidate supplier the same written brief. Include box style, internal and external dimensions, product weight, quantity, artwork versions, destination, arrival date, market, retail or ecommerce use, and whether the decorated box travels alone or inside a mailer. Attach product photographs and reference packaging, clearly labeling references as inspiration rather than exact specifications.
Require the quotation to separate tooling, plates, molds, sampling, unit price, export packing, and freight terms. Ask for realistic quantity breaks, whether setup charges repeat, how long pricing remains valid, and which changes alter unit price. Paper, foil, magnets, foam, labor, and freight can change independently. A low unit price that excludes essential setup or protective packing is not comparable with a complete price.
Name materials precisely. “Cardboard” is not a specification. For folding cartons, identify board family, caliper or basis weight, surface, recycled content when relevant, and grain direction. For rigid boxes, record greyboard thickness, wrap paper, liner, adhesive, and corner construction. For corrugated boxes, record flute, liner combination, board grade, and strength requirements appropriate to product weight.
Record the print process too. Digital printing can suit prototypes and selected short runs, but its color and surface may differ from offset production. Four-color process printing builds colors from cyan, magenta, yellow, and black; a named spot color targets a mixed ink. The correct method depends on quantity, artwork, substrate, budget, and brand-color sensitivity.
Freeze the Product Before the Package
A sample is valid only for the product used in testing. Confirm maximum dimensions rather than relying on a nominal drawing. Include manufacturing tolerances, caps, pumps, cables, booklets, refills, bags, and every item the customer receives. Weigh the heaviest configuration. If models vary, decide whether one insert holds all of them or separate inserts are needed.
Send physical product samples when practical. Three-dimensional files help engineering but do not reveal friction, compressibility, weight distribution, sharp edges, loose parts, or natural removal. Mark each engineering sample with its revision. If a prototype differs from production, document every expected change before approving packaging.
Define clearance deliberately. Too little can scratch a coated product or slow packing. Too much reduces precision and permits movement. Soft goods may tolerate compression, while glass, electronics, and decorated cosmetic parts need controlled separation. The correct gap depends on material, assembly, temperature, and whether the customer lifts, slides, or pulls the item out.
Approve the Dieline Before Artwork
The supplier dieline is the manufacturing map: cuts, creases, glue zones, folds, panels, flaps, bleed, and safe areas. Never place final artwork on a self-made rectangle and expect the printer to adapt it. Request the production dieline after structure and dimensions are confirmed, then lock its scale and layers.
Print it full size, cut it, fold it, and insert the real product. This catches a front panel mistaken for the back, a barcode under a flap, legal text crossing a score, instructions upside down, or a logo hidden in stacking. Review every face in customer opening order, shipping orientation, and retail orientation.
Keep copy away from cuts, creases, glue areas, and wrapped corners. Very small type, reversed lines, or delicate foil may fail on textured paper. Ask the converter for minimum line, gap, type, knockout, and registration capabilities for the chosen plant and material. Add a revision block with project, component, dieline number, artwork revision, date, dimensions, colors, and finishes. “Final-new.pdf” is not version control; a code such as CARTON-AW-R04 is traceable.
Use the Right Sample Sequence
One sample cannot answer every question economically. First request an unprinted structural sample from the intended board or a declared substitute. Confirm size, folding, closure, insert fit, removal, and strength. Next approve a print or finish proof for color, texture, coating, foil, or relief. Finally request a fully decorated preproduction sample when order value or failure risk justifies it.
Ask what differs from mass production. A hand-cut sample may have cleaner edges but less representative creases. A digital proof can show layout but not offset color. Hand-applied foil may not demonstrate production registration. Plotter-cut corrugated board may behave differently from rotary-die production. Differences are manageable when written down and dangerous when assumed away.
For unfamiliar structures, compare several numbered versions. Small changes to thumb notches, dust flaps, ribbon length, magnet location, shoulder height, or clearance can transform use. Record why one version wins. Test assembly with actual packers, measuring time, confusing steps, tools, and cosmetic damage. Thirty unnecessary seconds per box can outweigh a small material saving.
Structural Sample Approval Checklist
| Check | Verify | Acceptance question |
|---|---|---|
| Dimensions | Internal and external size at defined points | Does every product within tolerance fit? |
| Assembly | Fold order, glue, corners, locking tabs | Can packers assemble it consistently? |
| Closure | Tuck, magnet, friction, sleeve, or lid | Does it stay closed yet open naturally? |
| Insert | Retention, contact, removal, accessories | Are components controlled without damage? |
| Presentation | Centering, reveal, gap, sequence | Is the first view intentional? |
| Strength | Bowing, crush, seams, stacking | Can it survive the intended journey? |
| Safety | Edges, residue, odor, loose parts | Is it appropriate for the product? |
Measure with the method used during inspection. Rigid boxes may be measured inside or outside, and results depend on caliper location. Paper responds to humidity. Define measurement points, conditioning, and tolerances instead of demanding “exact” dimensions. Exactness without a method cannot be inspected.
Control Color Without Trusting a Screen
A monitor communicates ideas; it is not a production standard. Brightness, profile, viewing conditions, and color space differ from ink on paper. The same ink changes across coated board, uncoated paper, kraft, colored paper, and laminates. Identify critical colors and those allowed normal process variation.
For a critical color, supply a recognized physical reference or approved printed master on similar stock. Ask whether the plant uses spot ink or process build and agree on measured targets and tolerances when consistency matters. View proofs under neutral controlled light. Warm office lamps and window daylight can make one sample appear different.
Kraft and colored stocks influence transparent ink. White artwork becomes board color unless opaque white or an underprint is specified. An underprint improves brightness but adds cost and registration considerations. Request a drawdown or press proof on the intended substrate. Approve gloss, matte, and soft-touch effects physically because finish changes perceived color and contrast.
Handle the proof. Soft-touch surfaces may show fingerprints, scuffs, or rub marks. Dark solids expose dust, scratches, fold cracking, and variation more readily than pale artwork. Bend, rub, tape-test, stack, and open samples instead of viewing them behind protective film.
Foil, Relief, and Special Finishes
Treat decoration as an operation, not a vague visual effect. For foil, record supplier, series, shade, gloss, and physical swatch. Agree on acceptable pinholes, flaking, incomplete transfer, and dull areas. Large foil fields and fine details create different challenges. For embossing or debossing, approve depth, edge definition, position, and the reverse-side appearance. Deep relief near a fold can weaken board.
If relief aligns with print or foil, define registration tolerance. Window film, metallic board, holographic material, textured wrap, and specialty coating should be tested for cracking, adhesion, odor, blocking, and abrasion. Confirm reorder availability and whether substitutions require permission. A rare beautiful paper becomes a supply risk when the next lot has a different texture or long lead time.
Inserts Are a Hidden Failure Point
An insert controls movement, presentation, protection, packing speed, and removal. Paperboard can ship flat and support a paper-based solution, but complicated folds slow assembly. Molded pulp offers protective shapes and a natural surface, though draft angles and texture influence presentation. Foam provides cushioning, yet density, recovery, odor, cutting quality, and material requirements need specification.
Test with the heaviest product and every accessory. Rotate and gently shake the closed package, reopen it, and inspect migration, scuffing, fibers, pressure marks, and displaced parts. Ask someone unfamiliar with the box to remove and replace the item. If removal needs explanation, add a notch, pull tab, ribbon, or clearer sequence.
Evaluate tolerance stacking. Product size, insert cutting, board thickness, wrap thickness, and manual placement all vary. A fit that works for one ideal prototype may bind in production. Test products from multiple lots and ask the supplier to model maximum and minimum component conditions.
Test the Entire Delivery System
A retail box is not automatically a shipping box. Define its mailer, void fill, seal, and orientation, then test the complete packed system at expected weight. A presentation box may resist compression but suffer corner dents or abrasion while moving in an oversized shipper.
Use a test plan matched to risk. At minimum, consider controlled drops on faces, edges, and corners; vibration or repeated movement; compression and stacking; and humidity review for paper components. Record configuration, pretest condition, sequence, and damage. Formal laboratory methods may be appropriate for fragile, regulated, valuable, or internationally distributed products.
Do not judge only whether the product works. Inspect crushed corners, lid gaps, rub marks, dust, shifted inserts, seals, and wrinkled wraps. Define whether sales-box damage is acceptable inside an outer shipper. The answer follows the customer promise and replacement cost.
Turn Quality Preferences Into Limits
Production contains variation. Define which defects are unacceptable and how a shipment will be sampled. Critical defects may involve safety, contamination, wrong legal information, or unusable closure. Major defects may include wrong dimensions, severe color deviation, missing print, loose inserts, open glue seams, or crushing. Minor defects may include small marks outside primary viewing areas.
Agree on sampling, acceptance limits, viewing distance, lighting, measurement tools, and reference images. A speck viewed from five centimeters is not equivalent to a missing logo, while a hidden weak seam cannot pass merely because it is invisible. Build a labeled defect library with accepted and rejected examples beside a scale. Photographs speed decisions but cannot replace a physical color or texture standard.
Sign and Preserve the Golden Sample
The final approved package becomes the production control sample. Buyer and supplier should keep matching signed units when practical. Label project, component, revision, approval date, materials, finish references, and signatures. Photograph consistent views and store the approval record with the purchase order.
State what it controls. If its color came from digital printing while production is offset, it may control layout and structure but not color. Hand-applied foil may control shade but not registration. Substitute board cannot control stiffness. List every exception so the sample makes no false promise. Protect retained samples from sun, humidity, dust, crushing, and uncontrolled handling.
Repeat Everything on the Purchase Order
Do not write only “same as sample.” Attach the controlled specification, dieline, artwork revision, material codes, finish references, quantity by version, packing, inspection terms, deviations, delivery terms, and golden-sample identity. Require written approval for substitutions. Ask for milestones covering materials, print, finishing, die cutting, assembly, inspection, packing, and dispatch.
For higher-risk work, request first-off approval, inline photographs, measured color data, or a press sheet before the entire quantity proceeds. Confirm master cartons: units per carton, dimensions, gross weight, dividers, corner protection, moisture protection, pallet pattern, stacking limit, and marks. Finished boxes are often damaged after conversion by overfilled cartons, empty space, excessive stacking, or moisture.
Questions That Reveal Supplier Control
Ask how the plant controls this exact job: Who checks the dieline against the product? How are paper lots identified? What color instruments are used? Who approves first-off pieces? How is foil registration checked? Which inspection records remain? How are rejected units separated? What occurs when defects appear after packing?
Request work similar in structure, material, finish, quantity, and destination, not only the most impressive showroom piece. Ask which operations are internal or subcontracted and how outside quality is managed. Strong suppliers identify conflicts, record revisions, disclose limitations, and explain consequences. Thoughtful technical objections are more useful than instant agreement. Preserve decisions in a shared written record.
Plan for Storage, Packing, and Human Handling
Packaging can pass a design review yet fail inside a warehouse. Ask how unfinished board, printed sheets, assembled boxes, and packed cartons will be protected from dust, sunlight, humidity, and crushing. Define whether boxes arrive flat or assembled, how long they can remain stored, and the recommended temperature and humidity range. Paper readily exchanges moisture with the surrounding air; dimensional movement, curling, weakened adhesive, and surface changes can appear after uncontrolled storage.
Map the packing station before approving the structure. Confirm table space, fixture needs, sequence of components, protective gloves, label location, carton sealing, and completed-unit staging. Make a short illustrated packing instruction from the approved sample and train operators with real components. Count every consumable, including tissue, seals, cards, desiccants, sleeves, and protective bags. A missing low-cost component can stop an expensive line.
Run a small packing pilot and inspect the first completed cartons. This exposes repeated fingerprints, reversed inserts, trapped ribbons, scratched products, incomplete locks, and inconsistent label placement. Record the expected units per hour and compare it with the commercial assumption. When a step repeatedly causes errors, improve the packaging or fixture instead of relying on reminders. A stable process produces a more consistent customer experience than final inspection alone.
A Practical Approval Workflow
Freeze product data; issue the quotation brief; choose structure and materials; receive the supplier dieline; approve a full-size paper mockup; approve an unprinted structural sample; freeze artwork; approve color and finish references; test a decorated sample with the real product; complete distribution tests; define defect limits; sign the golden sample; issue the controlled purchase order; inspect production; and archive records for reorder.
Not every launch needs the costliest proof. A stock box with a custom label, stamp, or sleeve can validate demand before tooling. A short digital run can test artwork and customer response. Match commitment to evidence: never place a large irreversible order while critical assumptions remain untested.
Compare total cost, including samples, tooling, assembly, inspection, freight volume, damage, storage, and obsolete inventory. A slightly higher-priced box that ships flat, packs quickly, and reduces returns may cost less overall. A fragile premium finish may add expense without customer value.
Reorder Control
Before reordering, confirm artwork, product size, legal copy, materials, version quantities, and route. Require declaration of changes in mill, board, ink, coating, foil, adhesive, tooling, production site, or subcontractor. An “equivalent” material can change stiffness, whiteness, texture, absorption, or folding.
Reference the golden sample and prior inspection but approve changes explicitly. Compare new color under controlled light, replace worn tooling when crease or cut quality declines, and track complaints by lot. A disciplined reorder is faster: specifications remove debate, the defect library speeds inspection, and the retained sample provides a shared target.
Final Buyer Checklist
Before authorizing production, confirm the real product fits; dieline and artwork revisions match; every panel has correct orientation; materials are named; critical colors have physical targets; finishes have references; the insert retains and releases correctly; the complete package passes its delivery tests; tolerances and visual limits are written; master-carton protection is defined; sample differences are recorded; and signed control samples are retained.
If an answer is “we discussed it” instead of “it is recorded here,” document it. Custom paper box packaging becomes predictable when creative intent becomes controlled manufacturing information. That translation is the most valuable part of sample approval and the best protection against an expensive reorder.
Frequently Asked Questions
How many samples should I approve before ordering custom paper boxes?
For a new structure, approve at least an unprinted structural sample and an appropriate color or finish proof. A fully decorated preproduction sample is advisable when order value, fragility, exact color, or finish complexity makes failure expensive.
Can a digital sample guarantee the color of an offset production run?
No. Different printing systems, inks, substrates, coatings, and lighting create differences. Use a physical color reference, substrate-specific proof, press target, and agreed tolerance for critical colors.
What should be written on a golden sample?
Record the project, component, dieline and artwork revisions, approval date, material and finish references, and signatures. List anything it does not control, such as production color when a different print process made the sample.
Why does a small custom box order cost so much per unit?
Tooling, prepress, machine setup, color adjustment, sampling, administration, and inspection are mostly fixed. With fewer units, those costs are divided across a smaller quantity. Stock boxes with labels, sleeves, or stamps can validate demand first.
What is the most important check before mass production?
Confirm the complete packed system with the real product, not an empty display sample. This review connects dimensions, tolerances, insert performance, closure, presentation, packing labor, and delivery protection. Preserve the approved result as the production control standard.